|
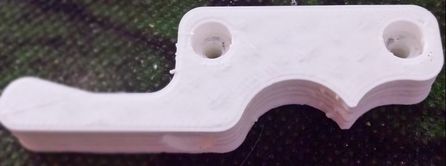
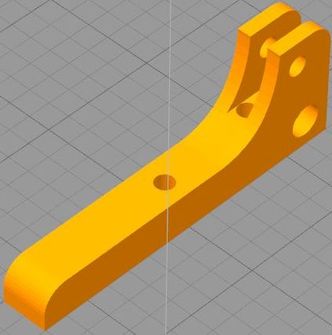
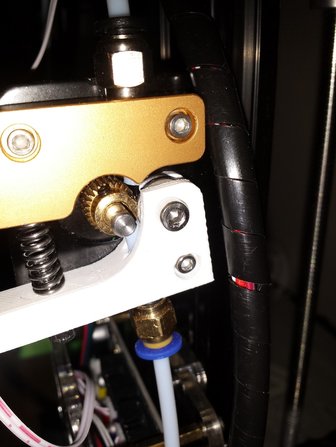
I decided to finally take the plunge into printing in a flexible filament. I did some research into printing TPU and found that it was quite difficult as it's so flexible. Well turns out it is! The problem that I came across when printing was it catching on the extruder gear and spilling out the top. I did some digging and found that it needs a mod on the extruders top handle. This is what it looked like. Where the dip is between the two holes is a small hole where the filament goes, this feeds into the PTFE tube from the extruder gear. I got 20% into the print when the filament started to get caught and spew out the right side of the dip, so it wasn't going up the small hole ("that's what she said") To fix this I returned to the stock handle and just push the PTFE tube in a bit more so it was millimeters from the gear and pulley. This made the filament less likely to "spew" out the ends. Print number 2 under way, this time it got 67% in when the opposite happened it started spewing out the bottom before it got to the gear...weird. So back to the drawing board.. I had a thought if the top worked so well with the PTFE tube pushed in more so it was closer to the gear and pulley why not just make a bottom handle with a bigger feed hole ("wheeyy") to feed the PTFE tube up closer to the gear and pulley. Therefore this would eliminate the "spewing" out the sides. Quick 20mins on CAD and came up with this... The only real difference is that the feed hole is larger. When I printed it i did have to boar out the feed hole a little as my calculations were a bit off. I also had to sand down the walls as the bearing didn't spin freely. After 10mins of doing that it was ready to assemble and test. Here is a crude picture of what it looks like assembled. I have since spun the PTFE tube round so it's angled more towards the pulley but as you can see there is now more support between both fee holes. I also added a Pneumatic Straight Fitting Connector so the PTFE tube didn't move.
Tested the print and SUCCESS!! no clogging, retraction works although I slowed it down slightly just to be safe and no more SPEWING OUT THE SIDES!!! If you want to have a go and use this, here is the original file. I will try to tweak it if I get time as the feed hole is slightly small and the walls could do with being thinner by 0.5mm. As for the Slicer settings. Temp 210/60 speed 40mm/sec Primary Layer height 0.1500mm Retraction Distance 1.20mm Retraction Speed 30mm/sec
3 Comments
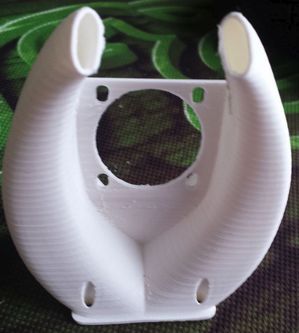
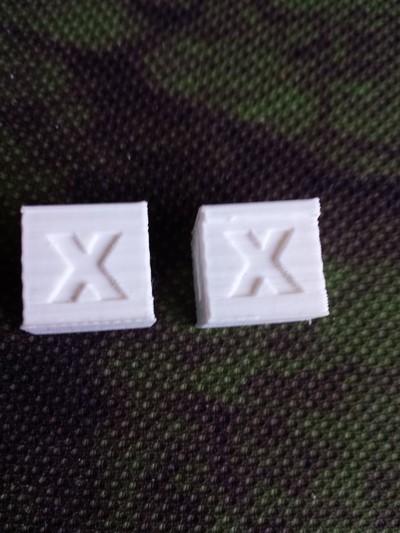
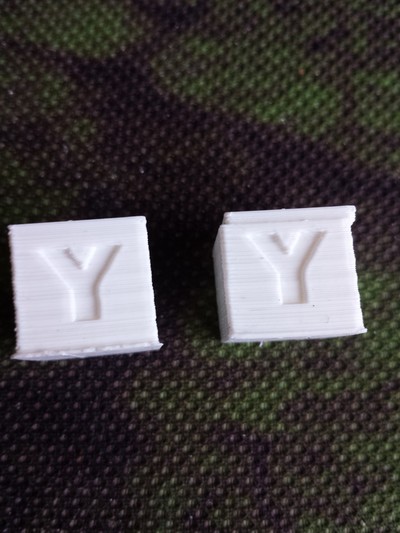
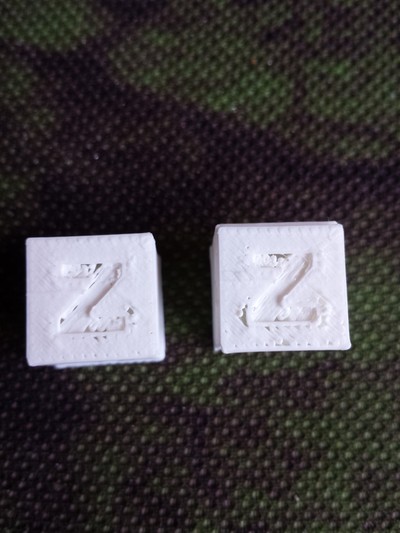
As cooling is an important part of 3D printing I was wondering what effect the direction air flow would cause on a print finish. The short test today is between the SN04 and the Tevo Tarantula Fang. Both can be found on thingiverse here and here Now don't get me wrong the SN04 is a great fan duct. I've been getting some awesome results from using it i just found it a pain when setting up my webcam it would get in the way and i wouldn't be able to see the layers. After fitting the Fang duct before doing a the test print I turned on the fan to see if it was pushing enough air through and I wasn't really too impressed with it. The ends seem a bit too far from the hotend which means that air isn't being directed sharply enough. Results So the results are in! and I'm actually surprised which on I think win's. The test print was a 20mm calibration cube which was scaled down by half. It has single wall thickness and 5% infil at 65mm/s. Unfortunately I got some layer shifting on the end of the last print as you'll see in the images below. The definition of the letters are clearly better with the SN04. There for I declare it the winner. I think as it has won I'm going to print a new one in the better PLA as it was one of the first things I printed and didn't really know what settings did what. The images below SN04 is on the Left and the Tevo Tarantula Fang is on the Right. (Yes I know the print isn't perfect on any of them but it was just a quick test) Let me know your thoughts on it, do you prefer the Fang over the SN04 or are you using a completely different one?
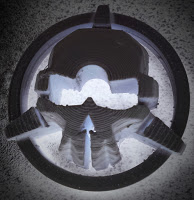
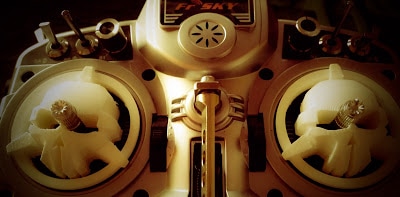
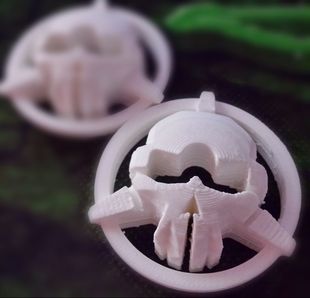
Apart from 3D printing I also fly racing quadcopters. Flying is a lot of fun but is annoying when you have to put soft packaging around your gear to protect the fragile bits. Or you have to put everything into a steel pelican case and lug that around either in the boot of your car, or wheel it behind you because it has no backpack straps. I decided to take the plunge and start putting my kit into an old skateboard backpack as I could attach the quad to the outside using straps The only problem with this is it has no padding on the inside and the sides aren't ridged enough to safely protect the radio gimbals. This is where the protectors come in!! As you may have read I bought a 1KG spool of Rigid.ink PLA which is fantastic. I decided the first "functional" print to try after a calibration cube was going to be the Rotor Riot Gimbal Protectors. After looking at the calibration cube seeing which settings I needed to tweak I set off the print. Two hours later I had a nice pair of white protectors. After cleaning the print up removing the odd string and bobble that the printer left behind I had a finished product. I got my FrSky Taranis out of my backpack (great radio by the way), tested, perfect fit! They're light, strong and look badass! Great addition to my bag of tricks! Next is to see if they are better printed in TPU as that plastic is more flexible. Could this be better for the sticks or will it be worse? Find out in the next blog post.
If you would like a set of these in PLA please click on the image above or click here This is my Rigid.ink Review. After debating which company to go for, for my 1st roll of filament I decided to go with Rigid.ink. I've got to say I'm not disappointed. Sticks every time to the bed (providing my printer isn't having issues, but that's my printer and now the filament). The white looks amazing, it's true white not discolored white. It's got a strong finish to it and is easy to clean up once printed. Very consistent prints. Would recommend, just wish I had more money to buy their TPU at the same time. I measured the filament and it seems at a consistent 1.75mm thickness which is good for a consistent long print.
This was my 1st print from the roll at default print settings. I'm Very impressed with the finished product. Would definitely recommend.
If you would like a roll click on the link below |
AuthorABOUT ME ArchivesCategories |
 RSS Feed
